Here is my latest transfer project. I used a wood workers transfer tool
to transfer an image onto some boring cream pillows. These were really
easy to do. And, there was no messy goo of any kind anywhere in the
project.
Things you'll need: Laser printer, woodworkers transfer tool, scissors, tape, pillow or whatever project you want to transfer to.
1. I first found an image I wanted to use from my favorite website
The Graphics Fairy. I used the
French Patisserie sign on the first pillow. On the second pillow I used the
French Wreath with bee graphic. I cut out the crown from the first pillow in photoshop and used it in the second pillow too.
2. My pillows were fairly large so I needed to blow the pictures up to fit a 20x20 space. I used
Block Posters.com to do this.
3. Next I printed them out "mirror image" on my new laser printer. It has to be a laser printer. If you don't know if you have laser or inkjet here's a quick way to tell. An inkjet has 2 ink cartridges. One for color and one for black and white. A laser printer on the other hand has 4 or 5 toner cartridges. (if it is a color printer) It has one cartridge for red, one for blue, and one for yellow, and one for black. This is what it looked like after I printed it out.
4. Next I carefully cut the border off of one side of the paper and taped them together. Do not tape on the graphic. If you don't get all the white space off when you tape the images together you will have a little white line down the center of your graphic when you transfer it. This did happen to me, so I just dabbed a little bit of black fabric paint on it. Worked perfect.When I was done cutting and taping this is what it looked like:
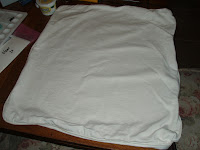
5. Next lay the graphic face down onto your pillow and tape it into place. I forgot to take a picture of this, but imagine the image above layed out on this pillow.
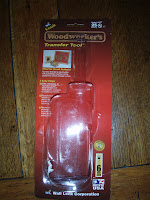
6. Plug in your woodworkers tool and let it heat up. This is what they look like. Once it's hot test it on some spare paper. It will burn the paper a little bit. Keep testing until no more brown comes off the tip. If you don't do this, and you touch it to your graphic, the burn mark will actually scorch your fabric.
7. Start heating your image. I ran the wand over the entire graphic first, then I concentrated on one edge at a time. Keep heating a section at a time until it's as dark as you want it. then peel the paper back. I would heat, peel back, look, then heat some more until I was satisfied. The good thing about this step is the ink sticks to your fabric so your paper will not move until you are ready to move it. You can heat and peel all you want and your graphic will not move.
That's all there is to it. This was one of the funnest graphics transfers I've done, and so easy. I will say though that I tried it on some different fabric and it didn't work quite as well. These pillows were just a heavy denim type canvas. So test your fabric first to make sure the heat makes the ink stick to it.


 5. Next lay the graphic face down onto your pillow and tape it into place. I forgot to take a picture of this, but imagine the image above layed out on this pillow.
 6. Plug in your woodworkers tool and let it heat up. This is what they look like. Once it's hot test it on some spare paper. It will burn the paper a little bit. Keep testing until no more brown comes off the tip. If you don't do this, and you touch it to your graphic, the burn mark will actually scorch your fabric.